
Set up email in Outlook 2010, 2007 / การตั้งค่าบัญชีอีเมลใน Outlook 2010, 2007
Required data
After you have created an e-mail address in the CodeOrange Control Panel (my.codeorange.co.th), you can use this information to set up your Office / Outlook to receive e-mail.
The server name for your domain can be found by re-storing the data of an e-mailbox in the Control Panel (without changes). Then you will see all the data including the server name.
Required information: Before you follow the steps, it is important that you have the following information at hand (which will be shown after you have created your address);
- E-mail address;
- E-mail user name;
- E-mail password;
- Server for incoming e-mail;
- Imap or Pop3;
- Server for outgoing e-mail;
Set up e-mail account step by step
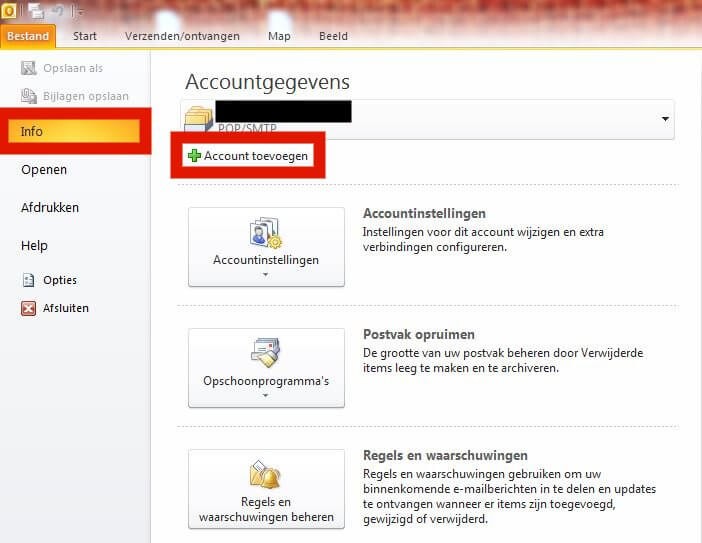
Step 1: Open Microsoft Outlook and choose "File" and then go to "Add Account"
- Do you want to use Pop? Then choose " Pop ";
- Do you want to use Imap? Then choose " Imap " (standard, recommended)
| IMAP: The e-mail remains on the server so you can access it from multiple devices.Pop: The e-mail is forwarded to your device. Does not remain on the server. |
2. If you receive an SSL certificate error, you may have entered a different name for incoming or outgoing Server Name than servername.codeorange.host for example mail.yourproperty.com. That works, but the certificate is not trusted. Solution: change the server name to the server name (ending in codeorange.host, which you will find in the overview of settings in the Control Panel).
สำหรับคู่มือภาษาไทยมีดังนี้
ข้อมูลที่ต้องการ
หลังจากที่ท่านได้ทำการสร้างอีเมลใน CodeOrange Control Panel (my.codeorange.co.th) แล้วท่านสามารถใช้ข้อมูลดังนี้เพื่อทำการตั้งค่าของOfficeและOutlookของท่านเพื่อรับอีเมล
ชื่อเซิร์ฟเวอร์โดเมนของท่านสามารถหาได้จากการ re-storing ข้อมูลของกล่องอีเมลใน Control Panel ท่านสามารถดูข้อมูลต่าง ๆ ได้รวมทั้งชื่อเซิร์ฟเวอร์ได้
ข้อมูลที่ต้องการ :
ท่านควรเตรียมข้อมูลสำคัญให้พร้อมก่อนที่จะดำเนินตามขั้นตอนดังต่อไปนี้ (ซึ่งข้อมูลดังกล่าวจะถูกแสดงหลังจากที่ท่านได้ทำการสร้างอีเมล)
1. ที่อยู่อีเมล
2. บัญชีผู้ใช้อีเมล
3. รหัสผ่านอีเมล
4. เซิร์ฟเวอร์สำหรับอีเมลขาเข้า
5. เซิร์ฟเวอร์สำหรับอีเมลขาออก
6. IMAP หรือ POP3
ขั้นตอนการตั้งค่าบัญชีอีเมล
ขั้นตอนที่ 1 : เปิด Microsoft Outlook และทำการเลือกที่ "File" หลังจากนั้นไปยัง "Add Account"
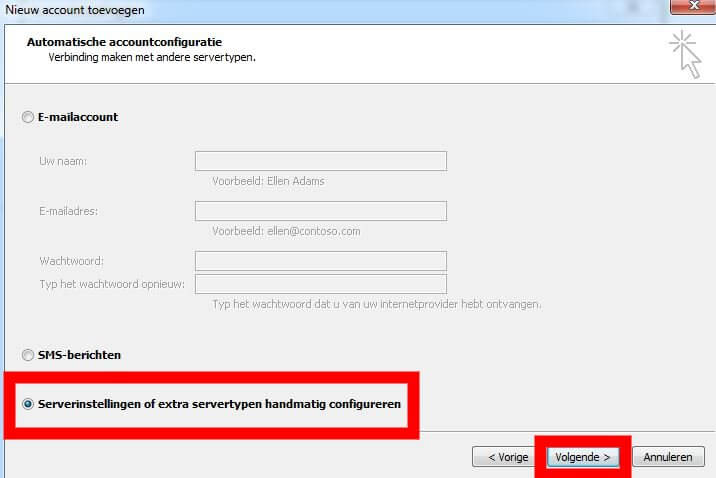
ขั้นตอนที่ 2 : เลือก "Manually configure server settings or additional server types" หลังจากนั้นเลือกที่ "next"
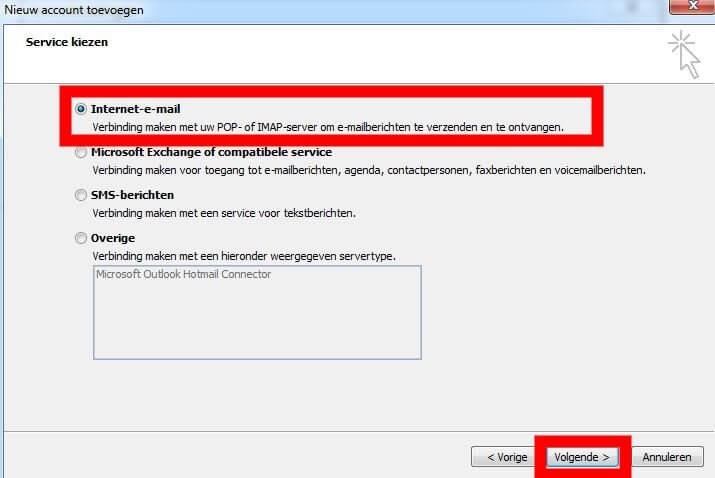
ขั้นตอนที่ 3 : เลือก "Internet e-mail" และทำการเลือกที่ "Next"
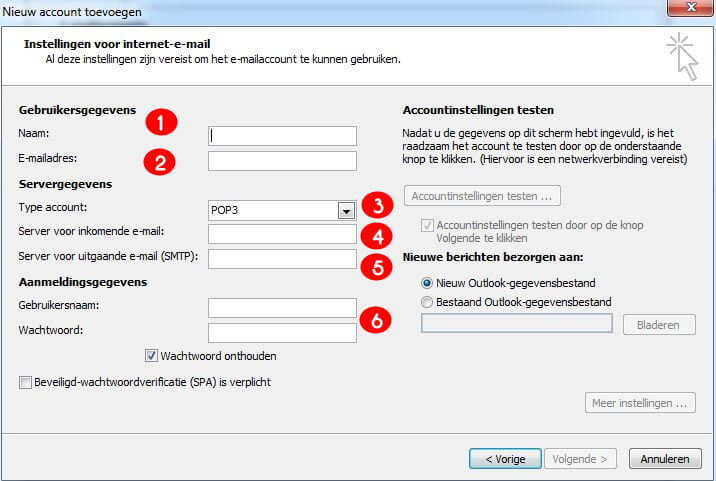
ขั้นตอนที่ 4 : ตามรูปภาพทางด้านล่างท่านจะเห็นตัวเลือกต่างๆ เราจะทำการอธิบายตัวเลือกดังกล่างดังนี้
2. Email address : กรอกอีเมลของท่านที่ช่องนี้
3. Type of Account : รูปแบบของบัญชี
| IMAP: อีเมลอยู่ในเซิร์ฟเวอร์ ท่านจะสามารถเข้าใช้งานได้จากหลายอุปกรณ์
POP: ข้อมูลต่าง ๆ ถูกส่งไปยังอุปกรณ์ทันที หากเข้าใช้ผ่านอุปกรณ์ชิ้นอื่นจะไม่สามารถได้รับอีเมลที่ถูกส่งออกไปแล้ว |
หลังจากที่ท่านได้ทำการตั้งค่าทุกอย่างเรียบร้อยให้เลือกที่ "test Account Settings" ระบบจะทำการส่งอีเมลทดสอบเพื่อตรวจสอบการตั้งค่าต่าง ๆ เช่น SMTP POP หรือ IMAP ที่ท่านเลือกใช้ หรือท่านสามารถปิดการใช้งานในส่วนนี้ได้โดยการทำเครื่องหมายถูกที่หน้า "Account settings" หลังจากนั้นเลือกที่ "Next" การตั้งค่าเสร็จสมบูรณ์ท่านสามารถรับส่งอีเมลได้ตามปกติ