
Adding your first website
Pricing: Even though you see pricing for the order, Code Orange doesn't charge you for the hosting. You can set up any pricing for your customers in the control panel. We only charge you for the domain if you buy a new domain or transfer it to us.
Important: Every order is for 1 account or client; do not try to order for multiple clients at once.
Step by step:
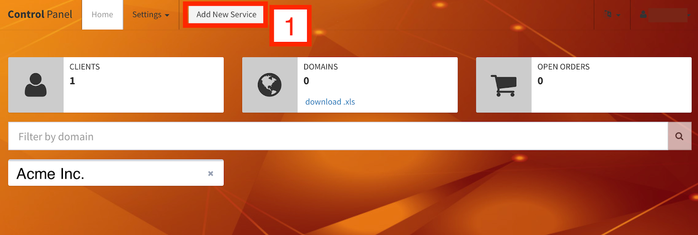
- Log in to the Control Panel (my.codeorange.co.th). Click “Add New Service” to access the store
- Search for your domain or buy a new one
- Check out: add to existing client or create new one
- You will receive emails to confirm your order and details to log in
- Optionally install SSL
- Optionally install WordPress
- Optionally add CDN
1. Log in to the Control Panel (my.codeorange.co.th).Click “Add Service” to access the store
2. Search for your domain or buy a new one, add to existing client or create new oneAdding a domain to the shopping cart
1) Select the domain
2) Select plan (for hosting select Small Business) and click on "Select"
3) Click Continue to add the domain(s) to the shopping cart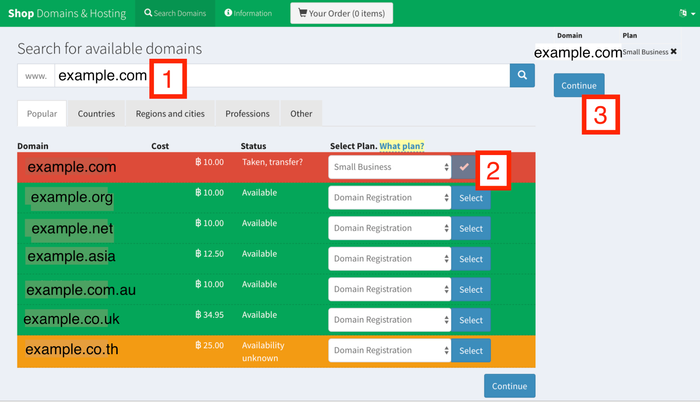
Red means not available (but if it’s yours you can still select it)Green means it’s available for registration
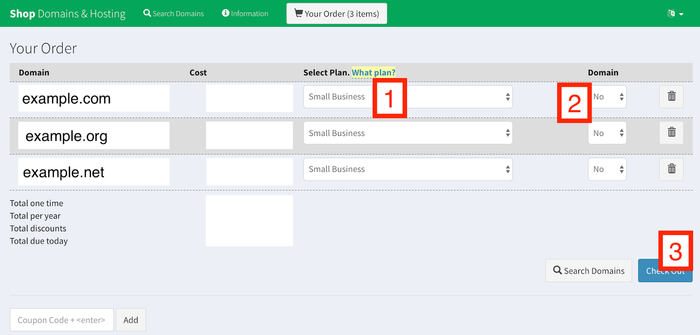
3. Check out
1) Change the plan if it's not correct. Typically you select "Small Business" for normal web hosting2) Select to buy/transfer the domain or not3) Click "check out"
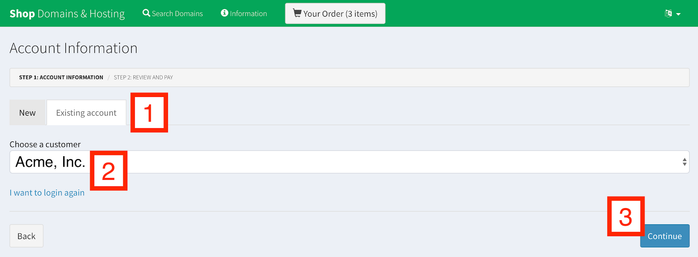
Important: choose if this is for a New client or an Existing client/account.1) Select a New or Existing account, continue
2a) If you chose New at step 1, fill out all information
2b) If you chose Existing at step 1, select the account
3) Click Continue
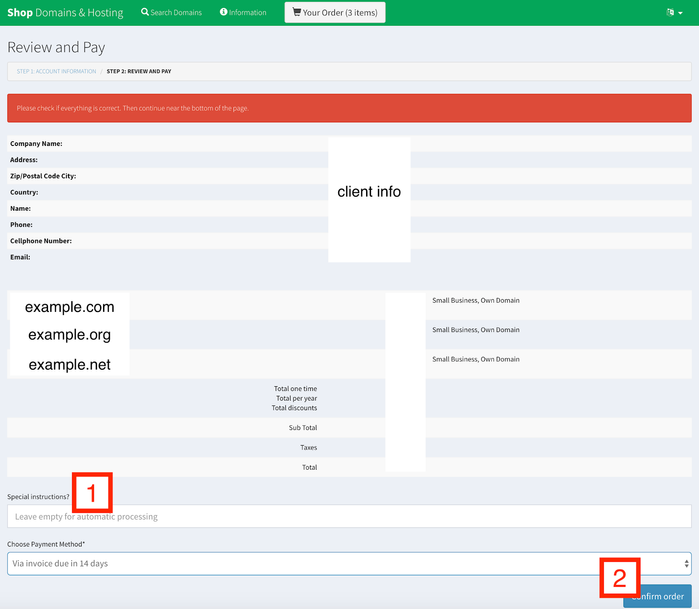
Check everything and confirmNote: If you have a Agency package, you don’t need to pay this amount. You will only see domain charges on your next invoice if you register a new domain or buy inbound domain transfers, and extra IP addresses.
1) Leave comments empty to process automatically.
2) Click to confirm order
4. You will receive an email to confirm your order
You will receive an email to confirm your orderNext you will receive an email with the order details
For inbound domain transfers you will get a separate email to start it.
Lastly, when the order is completed you get an email confirmation
5. Optionally Install SSL
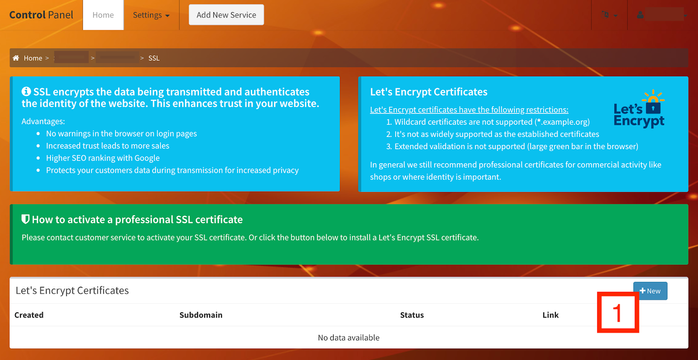
Please note: To generate your SSL certificate, the domain needs to point at your server. That means, you should have already updated the DNS, or the domain registration (or inbound transfer) should be completed.
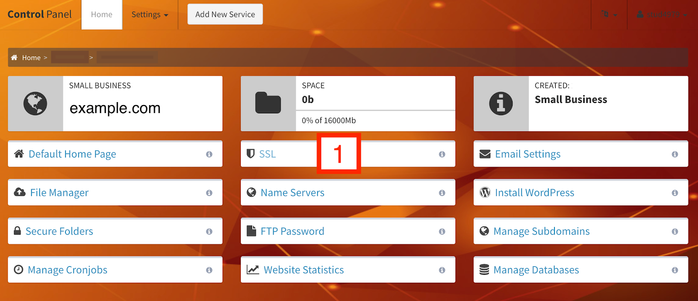
Select the client, then the domain, then select "SSL"
Click "New"
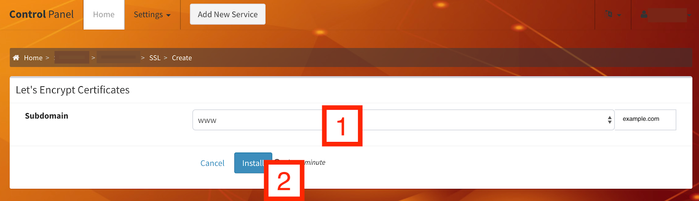
Select sub domain, then click "Install" to start the SSL installationWait less than 1 minute for the installation to complete
6. Optionally install WordPress (similar to step 5)Select the client, then the domain, then select Install WordPress and follow the steps

7. Optional Content Delivery Network (CDN)
What is it? A content delivery network (CDN) puts the building blocks of your website (such as images, videos, stylesheets and javascripts) on many servers around the world. The CDN then ensures that visitors of your website load those building blocks of a server closest to them. This typically means better usage of your server and faster load times for visitors, wherever they are located.
A CDN is available for each website. Simply send an email to our support and mention the domain it’s for and it will provisioned for you. Please be very specific… www.domain.com is not the same as domain.com. And http is different from https.
- Contact us with the exact URL you need the CDN for
Note: a CDN is not always better to use, feel free to ask us for advice.
More information about adding a CDN to your website, you can find here: Set up CDN / การติดตั้ง CDN
Next Steps
You can look at customizing your control panel here: Customize your control panel and other customizations / การปรับแต่ง control panel